
用golang搬砖有一段时间了,但还没有从零开始搭建过golang的项目,正好想把之前的隐写术小程序重构一下,借此机会实战一下golang的hertz框架项目开发,本文档用于记录一些通用的开发流程和项目搭建流程,希望能帮到一起学习golang的同学。
Re:从零开始的golang-hertz项目实战一、环境准备
1、准备golang环境
下载安装golang最新版本即可,注意hertz要求go-version >= 1.15
1
go version //查看版本
没开梯子需要额外设置下GOPROXY代理
1
2
3
4
# golang>=1.13默认开启,GOMODULE类似Maven
go env -w GO111MODULE=on
# 打开国内代理
go env -w GOPROXY=https://goproxy.cn,direct
2、安装命令行工具hz
hz可以帮忙我们快速生成项目脚手架
1
2
go install github.com/cloudwego/hertz/cmd/hz@latest
hz -v	//查看版本
3、安装make命令
方便实用makefile对项目构建持续集成
1
choco install make
4、安装代码规范插件gofmt、goimports、golangci-lint
以GOLAND为例,首先安装file watchers插件
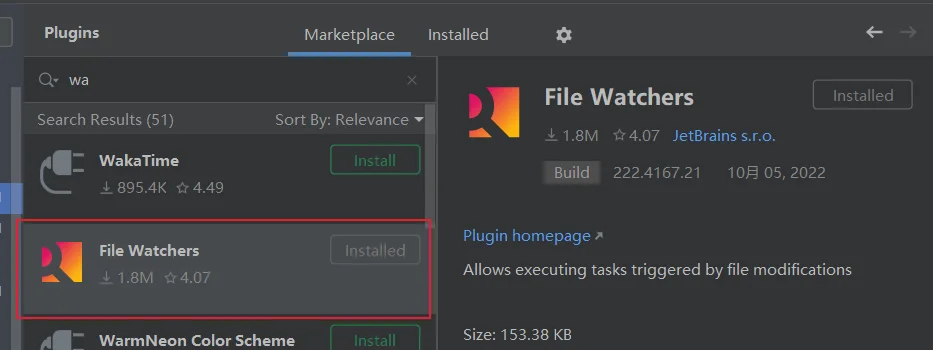
然后在Tools->File Watchers导入三个包
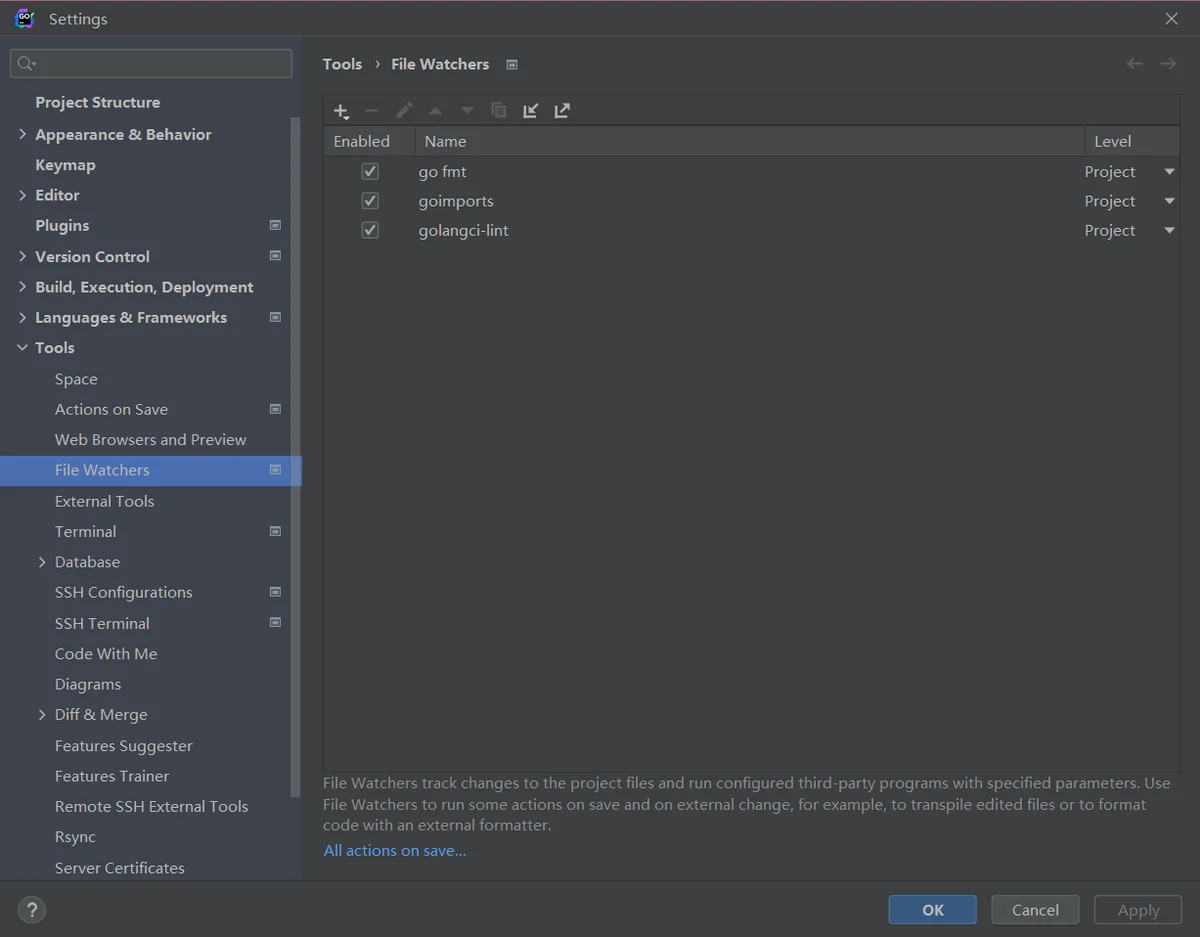
Trigger the watcher on external changes二、脚手架项目创建
1、初始化hertz template
找个目录新建个project,在该project目录下新建hz脚手架项目(非gopath目录下创建项目需要指定使用-mod参数手动指定module name)
1
2
3
mkdir your_dir
cd your_dir
hz new -mod github.com/xhdd123321/whicinth-steganography-bd
2、创建Makefile
项目根目录下创建Makefile文件
1
2
3
4
5
6
7
8
9
10
11
12
13
14
15
16
17
18
19
20
21
BIN_FILE=whicinth-steganography-bd

hello:
	echo "Hello"

build:
	go build -o ${BIN_FILE}

run:
	./${BIN_FILE}

start:
	nohup make run > output/start_`date +%Y-%m-%d`.txt 2> output/run_`date +%Y-%m-%d`.txt &

stop:
	pidof ./${BIN_FILE} | xargs kill -9

restart: stop start

build&run: build run
3、目录结构
1
2
3
4
5
6
7
8
9
10
11
12
13
14
15
16
17
18
19
20
21
22
23
24
.
├── biz                                // business 层,存放业务逻辑相关流程
│   ├── handler                        // 存放 handler 文件
│   │   ├── hello                      // hello/example 对应 thrift idl 中定义的 namespace;而对于 protobuf idl,则是对应 go_package 的最后一级
│   │   │   └── example
│   │   │       ├── hello_service.go   // handler 文件,用户在该文件里实现 IDL service 定义的方法,update 时会查找 当前文件已有的 handler 在尾部追加新的 handler
│   │   │       └── new_service.go     // 同上,idl 中定义的每一个 service 对应一个文件
│   │   └── ping.go                    // 默认携带的 ping handler,用于生成代码快速调试,无其他特殊含义
│   ├── model                          // IDL 内容相关的生成代码
│   │   └── hello                      // hello/example 对应 thrift idl 中定义的 namespace;而对于 protobuf idl,则是对应 go_package
│   │     └── example
│   │         └── hello.go             // thriftgo 的产物,包含 hello.thrift 定义的内容的 go 代码,update 时会重新生成
│   └── router                         // idl 中定义的路由相关生成代码
│       ├── hello                      // hello/example 对应 thrift idl 中定义的namespace;而对于 protobuf idl,则是对应 go_package 的最后一级
│       │   └── example
│       │       ├── hello.go           // hz 为 hello.thrift 中定义的路由生成的路由注册代码;每次 update 相关 idl 会重新生成该文件
│       │       └── middleware.go      // 默认中间件函数,hz 为每一个生成的路由组都默认加了一个中间件;update 时会查找当前文件已有的 middleware 在尾部追加新的 middleware
│       └── register.go                // 调用注册每一个 idl 文件中的路由定义;当有新的 idl 加入,在更新的时候会自动插入其路由注册的调用;勿动
├── go.mod                             // go.mod 文件,如不在命令行指定,则默认使用相对于GOPATH的相对路径作为 module 名
├── idl                                // 用户定义的idl,位置可任意
│   └── hello.thrift
├── main.go                            // 程序入口
├── router.go                          // 用户自定义除 idl 外的路由方法
└── router_gen.go                      // hz 生成的路由注册代码,用于调用用户自定义的路由以及 hz 生成的路由
4、测试项目启动
1
2
make build&run
curl http://127.0.0.1:8888/ping
返回以下输出则项目启动成功
1
$ {"message":"pong"}
三、配置文件解耦
在项目中,往往有些属性是不能硬编码到代码中的,例如数据库链接、账号信息等。因此需要我们能在将这些数据写到配置文件中,在项目中读取。
1、Viper
Viper1、获取Viper
1
go get github.com/spf13/viper
2、编写config.yaml
1
2
3
4
5
6
7
8
9
10
11
12
13
14
15
16
17
18
19
20
21
App:
  HostPorts: 127.0.0.1:8888
  MaxRequestBodySize: 20971520  # 20M

Cronjob:
  TempFileMinute: 1440
  TokenMinute: 55

Qiniu:
  Domain: "https://your-domain"
  AccessKey: "your-AccessKey"
  SecretKey: "your-SecretKey"
  Bucket: "your-Bucket"
  Prefix: "your-Prefix"

Redis:
  Addr: "127.0.0.1:6379"
  Password: ""
  Db: 1
  EncodeLockSecond: 10
  DecodeLockSecond: 10
3、编写配置对应go struct
1
2
3
4
5
6
7
8
9
10
11
12
13
14
15
16
17
18
19
20
21
22
23
24
25
26
27
28
29
30
31
32
33
34
35
package viper

type Config struct {
	App     *App     `yaml:"App"`
	Cronjob *Cronjob `yaml:"Cronjob"`
	Qiniu   *Qiniu   `yaml:"Qiniu"`
	Redis   *Redis   `yaml:"Redis"`
}

type App struct {
	HostPorts          string `yaml:"HostPorts"`          // 服务监听的地址和端口
	MaxRequestBodySize int    `yaml:"MaxRequestBodySize"` // 最大的请求体大小
}

type Cronjob struct {
	TempFileMinute float64 `yaml:"TempFileMinute"` // 文件上传token刷新时间(默认1h过期)
	TokenMinute    float64 `yaml:"TokenMinute"`    // 临时文件夹最长生存时间
}

type Qiniu struct {
	Domain    string `yaml:"Domain"`    // 源站域名
	AccessKey string `yaml:"AccessKey"` // AK
	SecretKey string `yaml:"SecretKey"` // SK
	Bucket    string `yaml:"Bucket"`    // 空间名称
	Prefix    string `yaml:"Prefix"`    // 保存目录
}

type Redis struct {
	Addr             string `yaml:"Addr"`             // 服务所在地址和端口
	Password         string `yaml:"Password"`         // 密码
	Db               int    `yaml:"Db"`               // 数据库编号
	EncodeLockSecond int    `yaml:"EncodeLockSecond"` // 加密锁限流间隔
	DecodeLockSecond int    `yaml:"DecodeLockSecond"` // 解密锁限流间隔
}
4、初始化Viper
1
2
3
4
5
6
7
8
9
10
11
12
13
14
15
16
17
18
19
20
21
22
23
24
25
26
27
// InitViper 初始化Viper
func InitViper() {
	ctx := context.Background()
	viper.SetConfigType("yaml")
	runEnv := os.Getenv("RUN_ENV")
	confPath := utils.GetConfAbPath()
	if runEnv == "DEV" {
		viper.SetConfigFile(filepath.Join(confPath, "dev.config.yaml"))
	} else if runEnv == "PROD" {
		viper.SetConfigFile(filepath.Join(confPath, "prod.config.yaml"))
	} else {
		viper.SetConfigFile(filepath.Join(confPath, "default.config.yaml"))
	}

	if err := viper.ReadInConfig(); err != nil {
		hlog.CtxErrorf(ctx, "[Viper] ReadInConfig failed, err: %v", err)
	}

	if err := viper.Unmarshal(&Conf); err != nil {
		hlog.CtxErrorf(ctx, "[Viper] Unmarshal failed, err: %v", err)
	}

	hlog.CtxInfof(ctx, "[Viper] Conf.App: %#v", Conf.App)
	hlog.CtxInfof(ctx, "[Viper] Conf.Redis: %#v", Conf.Redis)
	hlog.CtxInfof(ctx, "[Viper] Conf.Qiniu: %#v", Conf.Qiniu)
	hlog.CtxInfof(ctx, "[Viper] Conf.Cronjob: %#v", Conf.Cronjob)
}
2、Godotenv
godotenv用于在服务启动时从.env文件中获取进程环境变量,可防止直接注入系统环境变量可能导致的冲突问题,适用于多环境开发配置
.env1
RUN_ENV = TEST
2、初始化Godotenv,将.env中的环境变量注入到进程中
1
2
3
4
5
6
7
8
// InitGodotenv 初始化环境变量
func InitGodotenv() {
	ctx := context.Background()
	if err := godotenv.Load(); err != nil {
		hlog.CtxErrorf(ctx, "[Godotenv] Init Env failed, err: %v", err)
	}
	hlog.CtxInfof(ctx, "[Godotenv] Init Env success, RUN_ENV: %v", os.Getenv("RUN_ENV"))
}
3、测试是否成功注入
1
2
3
4
func TestInitGodotenv(t *testing.T) {
	InitGodotenv()
	assert.EqualValues(t, "TEST", os.Getenv("RUN_ENV"))
}
四、组件接入
1、Redis
1、安装go-redis
Redis 6使用以下命令,Redis 7使用v9
1
go get github.com/go-redis/redis/v8
2、初始化Redis
1
2
3
4
5
6
7
8
9
10
11
12
13
14
15
16
17
18
19
20
21
// InitRedis 初始化Redis
func InitRedis() {
	// 配置初始化
	config = viper.Conf.Redis

	initRedis(context.Background(), &Client)
}

// initRedis 初始化Redis impl
func initRedis(ctx context.Context, client **redisv8.Client) {
	rdb := redisv8.NewClient(&redisv8.Options{
		Addr:     config.Addr,
		Password: config.Password,
		DB:       config.Db,
	})
	if rdb == nil {
		hlog.CtxFatalf(ctx, "[Redis] Init Failed")
	}
	*client = rdb
	hlog.CtxInfof(ctx, "[Redis] PING: %s\n", Client.Ping(ctx))
}
2、对象存储OS
本项目使用七牛云作为OS,实现图片的云存储
1、安装sdk
1
go get github.com/qiniu/go-sdk/v7
2、初始化配置
1
2
3
4
5
6
7
8
9
10
11
12
13
14
15
16
17
18
19
20
21
22
23
24
25
26
var (
	formUploader *storage.FormUploader
	upToken      string
	config       *viper.Qiniu
)

// InitQiniu 初始化七牛云OS
func InitQiniu() {
	// 配置初始化
	config = viper.Conf.Qiniu

	// 初始化时刷新凭证
	RefreshToken()

	cfg := storage.Config{}
	// 空间对应的机房
	cfg.Zone = &storage.ZoneHuabei
	// 是否使用https域名
	cfg.UseHTTPS = true
	// 上传是否使用CDN上传加速
	cfg.UseCdnDomains = false

	// 构建表单上传的对象
	formUploader = storage.NewFormUploader(&cfg)
	hlog.Info("[Qiniu] Init Qiniu Success")
}
3、文件上传接口实现示例
1
2
3
4
5
6
7
8
9
10
11
12
13
14
// PutFile 上传单文件
func PutFile(ctx context.Context, localFile string) (string, error) {
	ret := storage.PutRet{}
	hash, err := utils.GetFileHash(localFile)
	if err != nil {
		return "", err
	}
	err = formUploader.PutFile(ctx, &ret, upToken, fmt.Sprintf("%v/%v", config.Prefix, hash), localFile, nil)
	if err != nil {
		return "", err
	}
	hlog.CtxInfof(ctx, "[Qiniu] Put File path:[%v], key:[%v], hash:[%v]", localFile, ret.Key, ret.Hash)
	return fmt.Sprintf("%v/%v", config.Domain, ret.Key), nil
}
(可选)4、凭证刷新
上传凭证默认1h过期,因此需要手动实现刷新策略,这里推荐使用定时任务在凭证过期前主动获取新的Token
1
2
3
4
5
6
7
8
// RefreshToken 刷新凭证
func RefreshToken() {
	putPolicy := storage.PutPolicy{
		Scope: config.Bucket,
	}
	mac := qbox.NewMac(config.AccessKey, config.SecretKey)
	upToken = putPolicy.UploadToken(mac)
}
3、HTTP Client示例
对于没有提供SDK的openapi服务,我们需要自定义实现client,以requests包为基础实现的client在网上已经有较多的解决方案,这里以hertz提供的HTTP client为例,封装通用的服务客户端client
这里以提供图片无损压缩服务Tinify为例,该服务并未提供go SDK,需要我们自己作封装
1
2
3
4
5
6
7
8
9
10
11
12
13
14
15
16
17
18
19
20
21
22
23
24
25
26
27
28
29
30
31
32
33
34
35
36
37
38
39
40
41
42
43
44
var (
	Client *client.Client
	config *viper.Tinify
)

// InitTinify 初始化Tinify图片压缩Client
func InitTinify() {
	// 配置初始化
	config = viper.Conf.Tinify

	var err error
	clientCfg := &tls.Config{
		InsecureSkipVerify: true,
	}
	Client, err = client.NewClient(
		client.WithTLSConfig(clientCfg),
	)
	if err != nil {
		hlog.Fatalf("[Tinify] Init Tinify Failed, %v", err)
	}
	hlog.Info("[Tinify] Init Tinify Success, host: %v", config.Host)
}

func UploadImage2Compare(ctx context.Context, fByte []byte) (shrinkResp *model.ShrinkResp, err error) {
	req := protocol.AcquireRequest()
	res := protocol.AcquireResponse()
	defer func() {
		protocol.ReleaseRequest(req)
		protocol.ReleaseResponse(res)
	}()
	req.SetMethod(consts.MethodPost)
	req.SetRequestURI(config.Host + "/shrink")
	req.SetHeader("Authorization", config.Auth)
	req.SetBody(fByte)
	if err = Client.Do(context.Background(), req, res); err != nil {
		hlog.CtxErrorf(ctx, "[Tinify] Request shrink API, err: %v", err)
		return nil, err
	}
	shrinkResp = &model.ShrinkResp{}
	if err = json.Unmarshal(res.Body(), shrinkResp); err != nil {
		return nil, err
	}
	return shrinkResp, err
}
InsecureSkipVerifytrueTLS no support