
前面我们介绍了文章详情页面的展示的逻辑代码实现,这一节,我们将继续讲解文章列表的读取和展示、文章根据分类进行筛选、最新文章、热门文章等的调用处理逻辑。
首先,我们先编写文章列表页的前端代码。这里,我们文章采用类似WordPress博客的形式,直接将首页作为文章列表页面的展示。因此我们在template文件夹下创建index.html:
博客首页/文章列表html代码
{% include "partial/header.html" %}
<div class="layui-container index">
    <div class="layui-row layui-col-space15">
        <div class="layui-col-md8">
            <div class="layui-card">
                <div class="layui-card-body">
                    <ul class="article-list">
                        {% for item in articles %}
                        <li class="item">
                            <a href="/article/{{item.Id}}" class="link">
                                <h5 class="title">{{item.Title}}h5>
                                <div class="description">{{item.Description}}div>
                                <div class="meta">
                                    {% if item.Category %}<span>{{item.Category.Title}}span>{% endif %}
                                    <span>{{stampToDate(item.CreatedTime, "2006-01-02")}}span>
                                    <span>{{item.Views}} 阅读span>
                                div>
                            a>
                        li>
                        {% endfor %}
                    ul>
                div>
                {% if prevPage || nextPage %}
                <div class="layui-card-body text-center">
                    <div class="layui-box layui-laypage">
                        <a href="{{prevPage}}" class="layui-laypage-prev{% if !prevPage %} layui-disabled{% endif %}">上一页a>
                        <a href="{{nextPage}}" class="layui-laypage-next{% if !nextPage %} layui-disabled{% endif %}">下一页a>
                    div>
                div>
                {% endif %}
            div>
        div>

        <div class="layui-col-md4">
            {% include "partial/author.html" %}
            <div class="layui-card">
                <div class="layui-card-header">文章分类div>
                <div class="layui-card-body">
                    <ul class="aside-list">
                        {% for item in categories %}
                        <li class="item">
                            <a href="/?category_id={{item.Id}}" class="link">
                                <h5 class="title">{{item.Title}}h5>
                            a>
                        li>
                        {% endfor %}
                    ul>
                div>
            div>
            <div class="layui-card">
                <div class="layui-card-header">热门文章div>
                <div class="layui-card-body">
                    <ul class="aside-list">
                        {% for item in populars %}
                        <li class="item">
                            <a href="/article/{{item.Id}}" class="link">
                                <h5 class="title">{{item.Title}}h5>
                                <span class="extra">{{item.Views}}阅读span>
                            a>
                        li>
                        {% endfor %}
                    ul>
                div>
            div>
        div>
    div>
div>
{% include "partial/footer.html" %}
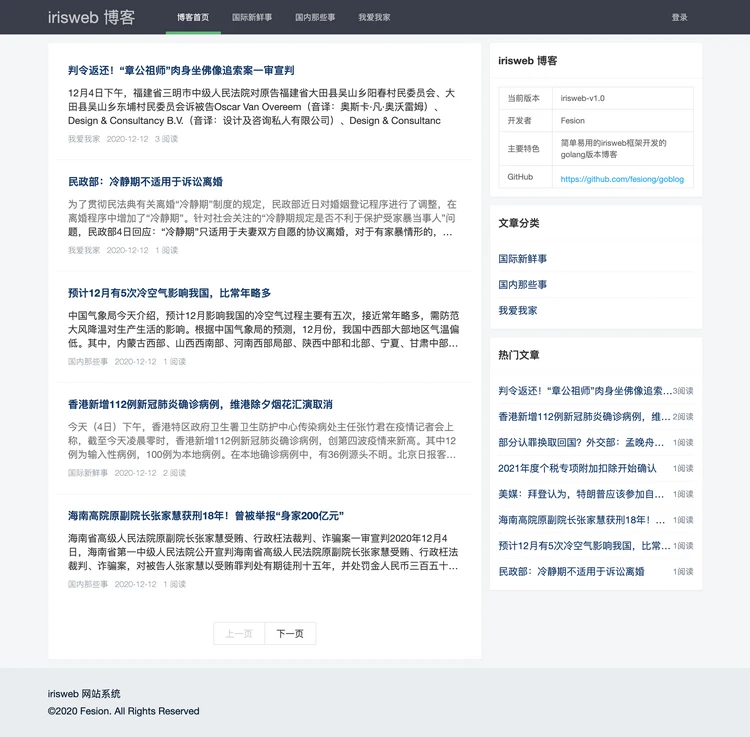
列表页中,我们将页面分割成两栏,左边栏大约占2/3,右边栏大约占1/3。左边栏中为文章的列表、上下页信息。文章列表中,我们将展示包括文章标题、文章简介、文章分类、文章发布时间、文章浏览量等信息。右边栏中,用来展示分类列表、热门文章等内容。
左边显示的文章分类信息中,我们注意到显示文章分类使用的是{{item.Category.Title}},这是因为我们定义文章模型的时候,article.Category 它指向的是文章分类的模型,article.Category.Title 就能访问到文章分类的名称了。并且文章并不一定会存在分类,因此我们需要先判断分类是否存在{% if item.Category %}{{item.Category.Title}}{% endif %},即文章存在分类的时候,我们才输出分类信息。
同样,这里的文章发布时间,我们使用了{{stampToDate(article.CreatedTime, "2006-01-02")}}来显示。stampToDate是我们前面自定义的模板函数,它可以将时间戳按照给定的格式格式化输出。这里我们将文章发布的时间戳按照"2006-01-02"的格式来输出显示。
这里,我们还注意到,输出上下页信息的时候,先判断是否存在上下页{% if prevPage || nextPage %} ... {% endif %},只要上一页存在,或下一页存在,我们才输出上下页的标签,否则这一整块都不显示。当这一块显示的时候,如果没有上一页,则上一页按钮不可点击{% if !prevPage %} layui-disabled{% endif %},同样,没有下一页的时候,下一页按钮也不能点击{% if !nextPage %} layui-disabled{% endif %}。
博客首页/文章列表控制器函数
文章博客首页/文章列表页面控制器我们写在controller/index.go index.go中修改IndexPage()函数:
func IndexPage(ctx iris.Context) {
	currentPage := ctx.URLParamIntDefault("page", 1)
	categoryId := uint(ctx.URLParamIntDefault("category_id", 0))
	//一页显示10条
	pageSize := 10
	//文章列表
	articles, total, _ := provider.GetArticleList(categoryId, "id desc", currentPage, pageSize)
	//读取列表的分类
	categories, _ := provider.GetCategories()
	for i, v := range articles {
		if v.CategoryId > 0 {
			for _, c := range categories {
				if c.Id == v.CategoryId {
					articles[i].Category = c
				}
			}
		}
	}
	//热门文章
	populars, _, _ := provider.GetArticleList(categoryId, "views desc", 1, 10)

	totalPage := math.Ceil(float64(total)/float64(pageSize))

	prevPage := ""
	nextPage := ""
	urlPfx := "/?"
	var category *model.Category
	if categoryId > 0 {
		urlPfx += fmt.Sprintf("category_id=%d&", categoryId)
		category, _ = provider.GetCategoryById(categoryId)
	}
	if currentPage > 1 {
		prevPage = fmt.Sprintf("%spage=%d", urlPfx, currentPage-1)
	}

	if currentPage < int(totalPage) {
		nextPage = fmt.Sprintf("%spage=%d", urlPfx, currentPage+1)
	}
	if currentPage == 2 {
		prevPage = strings.TrimRight(prevPage, "page=1")
	}

	ctx.ViewData("total", total)
	ctx.ViewData("articles", articles)
	ctx.ViewData("populars", populars)
	ctx.ViewData("totalPage", totalPage)
	ctx.ViewData("prevPage", prevPage)
	ctx.ViewData("nextPage", nextPage)
	ctx.ViewData("category", category)

	ctx.View("index.html")
}
在首页文章列表控制器中,我们需要从url中获取两个参数,一个是当前页面的页码currentPage := ctx.URLParamIntDefault("page", 1),另一个是当前页面的分类idcategoryId := uint(ctx.URLParamIntDefault("category_id", 0))。这里我们都是获取的int类型的数据,并且在没有获取到数据的时候,使用默认值来代替,因此我们使用了URLParamIntDefault方法。
我们每页显示10条,可以让列表页面差不多维持在2屏到2屏半左右的高度。pageSize := 10。
接着就是读取根据条件读取文章列表了articles, total, _ := provider.GetArticleList(categoryId, "id desc", currentPage, pageSize)。我们在 provider/article.go 中,增加GetArticleList函数:
func GetArticleList(categoryId uint, order string, currentPage int, pageSize int) ([]*model.Article, int64, error) {
	var articles []*model.Article
	offset := (currentPage - 1) * pageSize
	var total int64

	builder := config.DB.Model(model.Article{})
	if categoryId > 0 {
		builder = builder.Where("`category_id` = ?", categoryId)
	}
	if order != "" {
		builder = builder.Order(order)
	}
	if err := builder.Count(&total).Limit(pageSize).Offset(offset).Find(&articles).Error; err != nil {
		return nil, 0, err
	}

	return articles, total, nil
}
获取文章列表函数接收4个参数:
categoryId是分类id,如果指定分类id,则只显示当前分类的文章列表。order是排序规则,传入order参数可以根据指定的字段规则进行排序,如id desc则表示按id倒序来显示。currentPage是当前读取的页数,这个参数一般由url参数中获取。pageSize是一页显示数量,这里我们默认显示10条。
这里面我们通过当前页码和每页显示数量来计算出mysql的offsetoffset := (currentPage - 1) * pageSize。
再通过判断categoryId是否大于零来确定是否传入了分类id,如果有分类id,则添加分类id的条件builder = builder.Where("category_id = ?", categoryId)。
如果传入了order排序规则,则添加order条件builder = builder.Order(order)。
因为这是列表的展示,因此我们还需获取所有符合条件的文章数量,用来计算分页数量和分页展示信息var total int64。
最后将文章列表、符合条件的文章数量、错误信息返回给控制器。
接着我们继续读取所有的分类,用来将分类赋值给文章列表中的文章:
categories, _ := provider.GetCategories()
for i, v := range articles {
    if v.CategoryId > 0 {
        for _, c := range categories {
            if c.Id == v.CategoryId {
                articles[i].Category = c
            }
        }
    }
}
同样地,我们需要获取所有分类,也需要在 provider/category.go 中添加GetCategories函数:
func GetCategories() ([]*model.Category, error) {
	var categories []*model.Category
	db := config.DB
	err := db.Where("`status` = ?", 1).Find(&categories).Error
	if err != nil {
		return nil, err
	}

	return categories, nil
}
我们只读取status = 1的分类,因为我们开始的时候,定义了status为1 表示正常的数据,status为0表示审核的数据,status为99表示已删除的数据。我们在处理数据的时候,不采取直接删除的方式,这么做是为了防止手误等各种意外操作,造成数据误删而没有恢复的机会。
首页列表中,我们在右边栏中,显示了热门文章。这里我们将浏览量最多的文章认为是热门文章。
populars, _, _ := provider.GetArticleList(categoryId, "views desc", 1, 10)
同样地,热门文章我们也使用GetArticleList函数来获取数据,我们只需要将排序规则views desc传入即可得到浏览量最多的文章。这里我们不需要读取分页,也不需要获取符合条件的数量,因此我们使用populars, _, _ 来接收数据,只保留文章列表,存入populars变量中,其他变量忽略,使用下划线_表示。
接着我们通过计算,算出是否有上一页、下一页,以及根据条件拼接上一页、下一页的连接。
prevPage := ""
	nextPage := ""
	urlPfx := "/?"
	var category *model.Category
	if categoryId > 0 {
		urlPfx += fmt.Sprintf("category_id=%d&", categoryId)
		category, _ = provider.GetCategoryById(categoryId)
	}
	if currentPage > 1 {
		prevPage = fmt.Sprintf("%spage=%d", urlPfx, currentPage-1)
	}

	if currentPage < int(totalPage) {
		nextPage = fmt.Sprintf("%spage=%d", urlPfx, currentPage+1)
	}
	if currentPage == 2 {
		prevPage = strings.TrimRight(prevPage, "page=1")
	}
最后,将页面需要使用的变量,都注入到view中,供前端使用,并指定前端页面模板:
ctx.ViewData("total", total)
ctx.ViewData("articles", articles)
ctx.ViewData("populars", populars)
ctx.ViewData("totalPage", totalPage)
ctx.ViewData("prevPage", prevPage)
ctx.ViewData("nextPage", nextPage)
ctx.ViewData("category", category)

ctx.View("index.html")
配置首页文章列表页面路由
首页的路由,在一开始的时候,我们便已经配置过了,因此在这里我们不需要再次配置。它在route/route.go 中,我们给路由增加是否登录判断中间件:
app.Get("/", controller.Inspect, controller.IndexPage)
至此,我们的首页文章列表已经完成。我们的首页列表具有了分页功能,也能根据分类来筛选显示文章了。
验证结果
我们重启一下项目,我们先在浏览器中访问http://127.0.0.1:8001/来看看效果。如果不出意外可以看到这样的画面:
完整的项目示例代码托管在GitHub上,需要查看完整的项目代码可以到github.com/fesiong/goblog 上查看,也可以直接fork一份来在上面做修改。