
先吐槽一下,写的好几篇关于五行八卦的文章竟然被csdn提示违法国家法律。。。那只能考虑自建blog,不能被捆绑手脚了。
正巧也一直想搞一个本地的markdown系统,毕竟md放在本地总是第一要务。
目前流行的hugo试下来还蛮好,发文记录安装过程。
全程手工下载,不用git
一、准备执行文件hugo.exe
二、生成blogTest项目
hugo.exeD:/test/hugocmdhugo new site blogTest
D:/test/hugo/blogTestblogTesthugo.exe三、安装模板testTpl
官方模板下载地址:https://themes.gohugo.io/
testTplD:/test/hugo/blogTest/themes/testTpl四、创建文章first.md和about.md
D:/test/hugocmdhugo new first.md
hugo new posts/about.md
D:/test/hugo/blogTest/content/first.mdD:/test/hugo/blogTest/content/posts/about.mdabout.md文件内容如下:
---
title: "About"
date: 2022-06-26T16:15:50+08:00
draft: true
---
draft: true---## 好吧,测试一下五、自建服务器
D:/test/hugocmdhugo server --theme=testTpl --buildDrafts --watch
- theme:使用什么模板;
- buildDrafts:将草稿也显示出来;
- watch:任何文章修改都将实时同步刷新;

go serverhttp://127.0.0.1:1313六、生成静态文件
D:/test/hugocmd- 常规模式
hugo
-B--buildDraftshugo -B
- 各种命令模式
hugo --theme=testTpl --buildDrafts
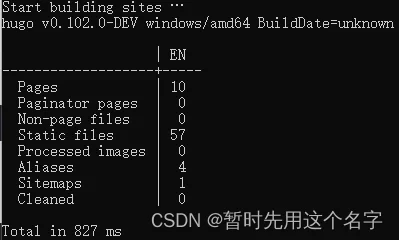
D:/test/hugo/blogTest/publicpublic七、配置文件
有两处配置是重点,如果这两处不配置,则生成的静态文件无法正常显示或舒畅使用:
D:/test/hugo/blogTest/config.tomlbaseURLthemebaseURLcontentthemeuglyURLsfalsetruebaseURL = 'http://127.0.0.1/hugo/blogTest/public/'
contentdir = "c:/blog/test"
languageCode = 'en-us'
title = 'My New Hugo Site'
theme = "testTpl"
uglyURLs = true
D:/test/hugo/blogTest/content/posts/about.mddraft: truedraft: falsehugogo serverfirst.mdabout.mdabout.mddraft: falsehugo八、开始写博客
插入基于当前笔记的相对路径config.tomlcontentdir参考:
Hugo 快速开始指引
世界上最快静态博客生成工具 Hugo 入门折腾
启用Ugly URL
配置 Hugo